
Astrophotography for beginners
Perhaps you got a new camera or smartphone for Christmas? Maybe one of your New Year resolutions is to learn a new skill? Or do you simply enjoy looking at the night sky and want to capture it? Thanks to modern technology, you can try astrophotography without telescopes or expensive tracking mounts, and there’s no better time to get started than when you have these long winter nights at your disposal.
Getting started
You’ll need a device on which you can manually change exposure time, focal length, ISO and focus. If you have a smartphone, you can download an app that lets you do this, such as Camera FV-5. Any DSLR or camera with interchangeable lenses is perfect.
You will need a tripod, or somewhere sturdy to rest your camera. Night-sky photography requires long exposure times, so you’ll want to stop any movement otherwise your image will blur! A useful accessory for DSLRs is a shutter release cable, which lets you press the shutter without moving the camera. This isn’t compulsory — you can use the timer instead— but it’s highly recommended for star trails and time lapses.
Next, you’ll need a dark sky and a clear night. This is rare in the UK, but there are resources such as Dark Sky Discovery’s light pollution map to help you find a good location. If you’d rather stay local and go out with a group, the Astronomy Society observe on campus when the weather allows.
Manual settings for astrophotography
Your camera can’t focus if it’s dark and there’s nothing to focus on. Fortunately, there are some tricks to overcome this problem. You can autofocus to a distant object and fix the focus, or even better, at night, find a distant streetlight or the Moon, switch to live view on your DSLR and manually focus. Beware, changing focal length (i.e. zooming) will put you out of focus!
If you want to get a lot of scenery and sky into your image, you’ll want to use a short focal length (wide lens), e.g. 10-18mm. To maximise the amount of light you let into the camera, select the lowest f-number you can, usually between f/2.8 and f/4. The exposure time should be as long as possible, usually 10–30s. If you want a crisp image, avoid star trailing by using the ‘500 rule’ – the maximum exposure you should use is 500 divided by the focal length. Finally, you’ll want a reasonable sensitivity, or ISO. Too low and your image will be dark; too high and it will be grainy. Usually, ISO 1600–6400 is best. Remember to shoot in RAW if possible!
It’s worth experimenting with settings since every location will be different; and getting it right means you won’t have to do much image processing afterwards.
Milky Way or single frame photos
If you’re lucky enough to be in a really dark location, you’ll be able to photograph the Milky Way. Try to bring out the contrast between dust and starlight if you can! Otherwise, you can still experiment with single frame photos, for example with people or telescopes in the foreground, or with light painting. It’s worth editing your photos in software such as GIMP or Photoshop/Lightroom to make certain features stand out. You can also combine two photos, e.g. one with the sky perfectly exposed, and one with the foreground.
(Below: ‘Milky Way from Tenerife’: 1x30s, 10mm at f/5, ISO 6400)
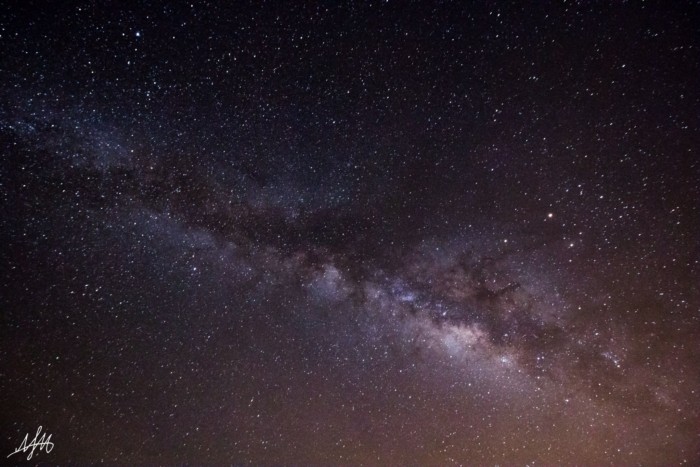
Image: Nikki Miller
Star trails and time lapses
If you have a shutter release cable, you can take star trail images and time lapses. There are several ways to do this, but one of the easiest is to put your camera into high speed continuous shooting mode, stick the shutter down and leave it for an houror two. You can combine your images afterwards with StarStax to make star trails, or Panolapse to make time lapse videos. If your camera has automatic noise reduction, turn it off unless you want gaps in your star trails!
To set up the image, it helps to find the pole star, the point around which the stars will revolve. If you’re unfamiliar with the night sky, consider getting a planetarium app.
(Below: ‘Star trails in Cornwall’: 80 x 15s, 11mm at f/5, ISO 3200.)
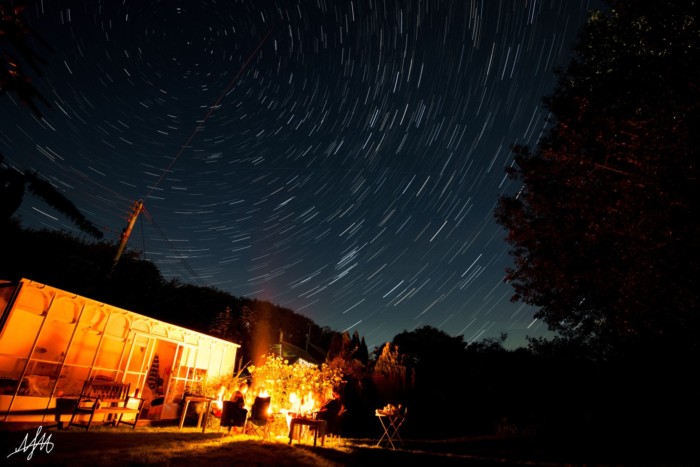
Image: Nikki Miller
Advanced astrophotography
If you’re willing to invest a bit of time and money, there’s a lot more you can do! With a tracking mount, you can take several images of the same part of the sky and stack them to bring out the detail. You can take photos of the Moon and planets using a telescope with your DSLR or a webcam by tracking the object and stacking single exposures or movie frames. Deep sky imaging (galaxies, nebulae) works on a similar principle. But no matter what equipment you have, you can and should get out there, enjoy the night sky and take some astro-photos!
Comments